Discover Simple Ways to Take Screenshots on Your Apple iPhone, iPad, Mac & Apple Watch
Do you often come across hilarious text conversations or funny memes that you want to save and share with your friends? Well, lucky for you, taking screenshots on your Apple iPhone or iPad, Mac & Apple Watch is as easy as pie!
Whether you want to capture an entire webpage or just a part of the screen on your Apple device? No problem! Saving, viewing and editing your screenshots is a breeze.
Taking Screenshots on Your Apple iPhone
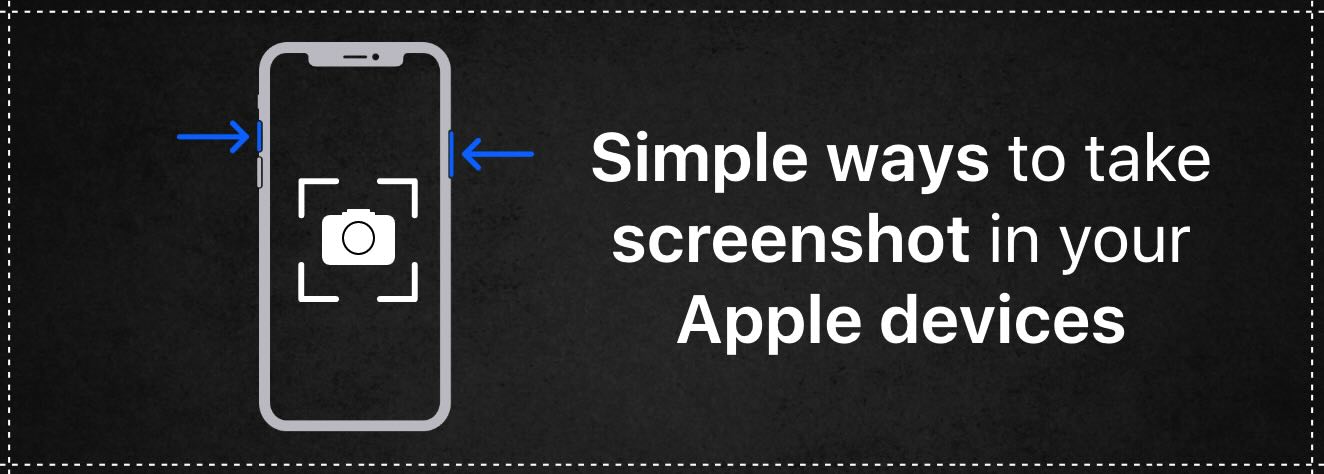
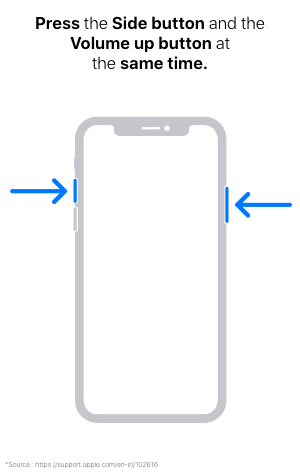
Simply press and release the side button and the volume up button at the same time, A thumbnail of the captured screenshot will appear in the lower-left corner of your screen.
Deep dive into this blog to know how you can take screenshots in many simple ways on your iPhone and also how you can take screenshots on your iPad, MacBook, and Apple Watch.
And the captured screenshots in your iPhone, iPad, are automatically saved in the Photos app while the screenshots in your MacBook are automatically saved on the desktop or the designated file you wanted to save your screenshots, so you can easily find and share them later. Your Apple Watch screenshots will be directly saved to the Photos app in your iPhone.
Capturing with Side Button and Volume Up Button:
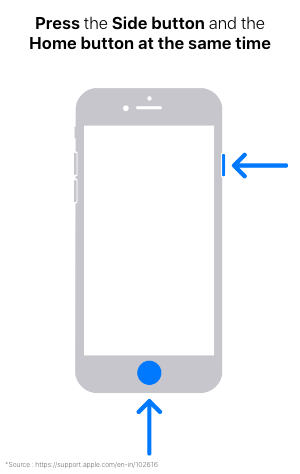
On an iPhone with Face ID, you can take a screenshot by pressing the side button and the volume up button at the same time. On an iPhone with Touch ID and a side button, you can take a screenshot by pressing the side button and the Home button at the same time.
Pro Tip - You can Take screenshots using `
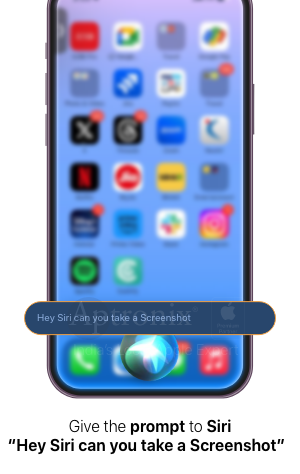
Taking a screenshot using Siri is a convenient and efficient way to capture what's on your iPhone screen.
You can activate Siri by pressing and holding, or you can even give a voice command with "Hey Siri, take a screenshot." Siri will respond by confirming that the screenshot has been taken. When the screenshot is captured you can hear a camera shutter sound, making sure that the screenshot is captured successfully.
Taking Screenshots using Assistive Touch (with Custom Top Level Menu):
With a simple tweak in the Accessibility settings, you can now create a custom gesture to capture screenshots effortlessly.
Here are steps on how you can take screenshots using Assistive Touch (with Custom Top Level Menu):
- Open the Settings app on your iPhone.
- Scroll down and tap on "Accessibility."
- Inside Accessibility, tap on "Touch."
- Select "AssistiveTouch."
- Toggle the AssistiveTouch switch to turn it on.
- Tap on "Customize Top Level Menu."
- Tap the "+" icon.
- Choose "Screenshot" from the list of options.
- Tap "Done" to save your choice.
- To take a screenshot, tap the AssistiveTouch button (a white circle) on your screen.
- Select "Screenshot" from the menu that appears.

It's a personalized and intuitive way to make your device work just the way you want it to!
Do you Know that?
You can even take a screenshot by tapping on your Apple logo!
This only works on iPhones with iOS 14 or later and the "Back Tap" feature enabled.
Here's how to set it up:
- Go to Settings > Accessibility > Touch > Back Tap.
- Choose Single Tap or Double Tap or Triple Tap.
- Select Screenshot. Tap done
Voila! Take screenshots with a quick tap on the back of your phone!
Taking Screenshots using Custom Actions in Assistive Touch:
You can also capture your screen with just a touch and whimsical gestures, a playful double tap, or a patient long press.
Here are steps on how you can take screenshots using Assistive Touch:
- Open the Settings app on your iPhone.
- Scroll down and tap on "Accessibility."
- Inside Accessibility, tap on "Touch."
- Select "AssistiveTouch."
- Toggle the AssistiveTouch switch to turn it on.
- Under "Custom Actions," find the gesture you created.
- Tap on it, then select "Screenshot" from the list of system actions.
- Confirm and save the custom action.
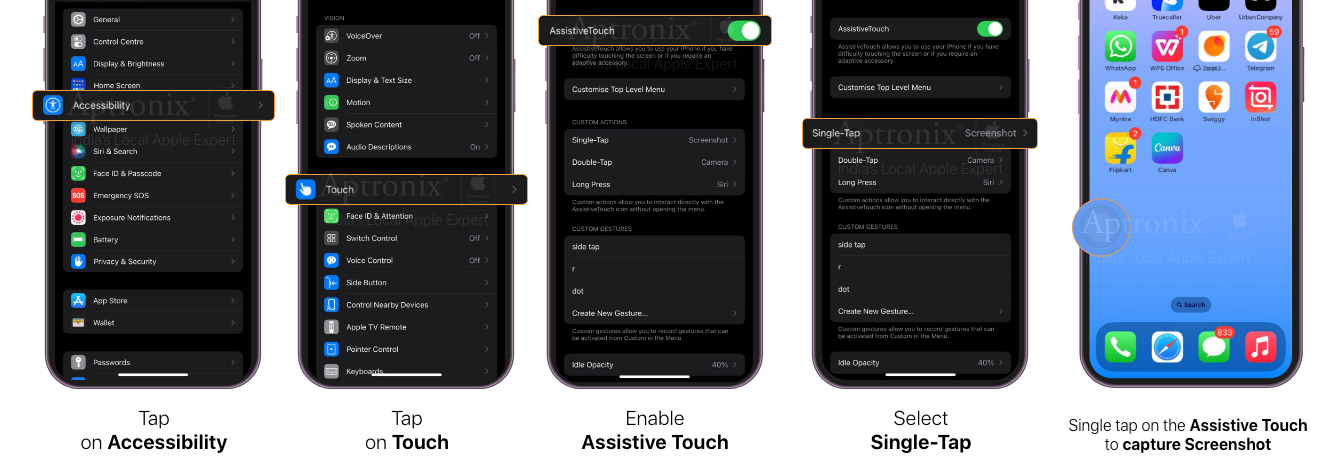
Voila!! Your screenshot of the screen you want is here.
If you wish to edit or add some creativity to it. Tap on the thumbnail and start editing!
Open the screenshot in the Markup editor!
You can now add flair or mark up your screenshots immediately and transform the simple captures into eye-catching screenshots that can be used for conveying everything you want to explain with just those edited screenshots you have captured!
How to open your screenshot in a markup tool?
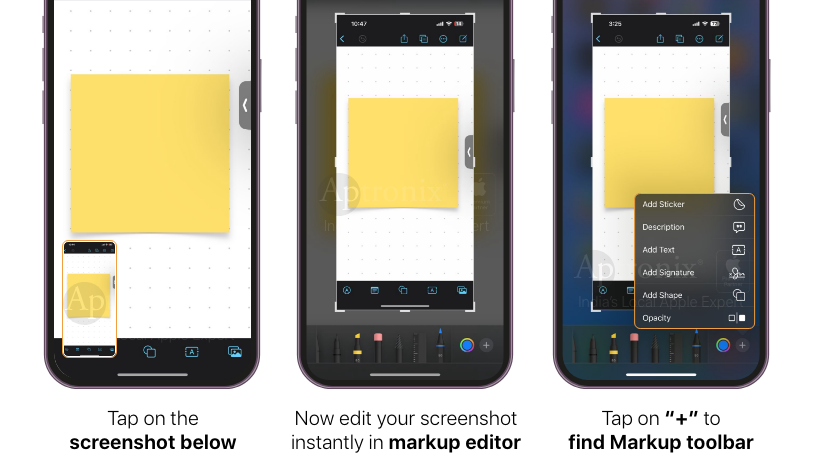
After taking a screenshot, tap immediately on the screenshot preview and your screenshot will appear with some editing options and tools which allows you to draw, add text, sticker, description, signature, shapes, etc.
Here's a step-by-step guide on how to use the markup editor :
- Click on the screenshot instantly after taking the screenshot.
- Tap the "+" button in the bottom right corner.
- Select the tool (add text, description, shapes, stickers and even signature) from the Markup toolbar.
- Use the formatting options at the bottom of the screen to adjust the font, size, style, and color of the text.
- Tap "Done" to save your changes.
Capturing Screenshots on Your iPad
Capturing screenshot on iPad with Face ID
To capture a screenshot on an iPad with Face ID, swiftly press and release the top button and volume button simultaneously.
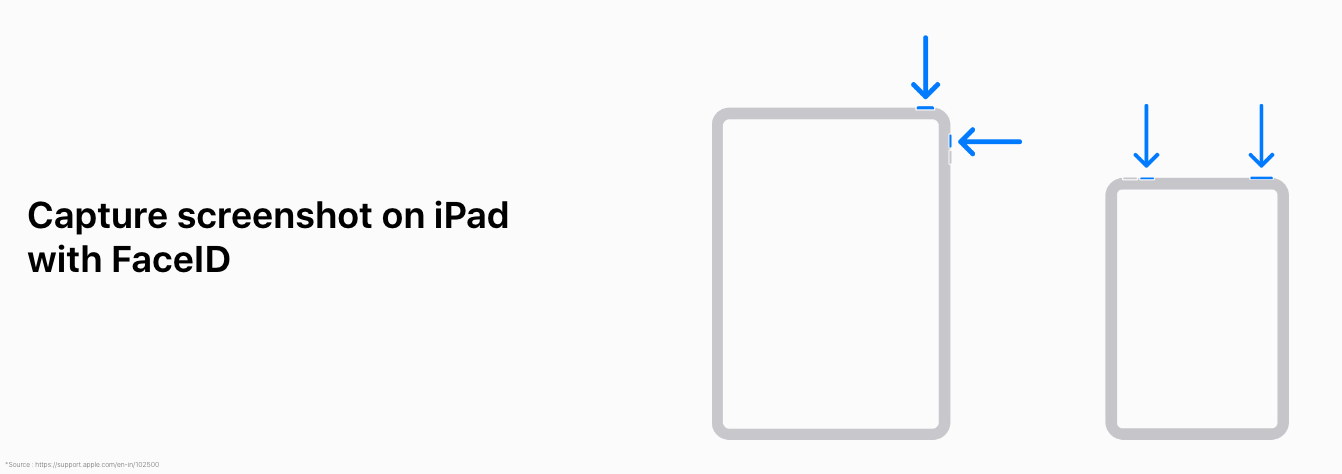
Your screenshots are automatically saved to your Photos app on your iPad. To see all your screenshots at once, open Photos and tap "Screenshots" under "Media Types" in the Photos sidebar.
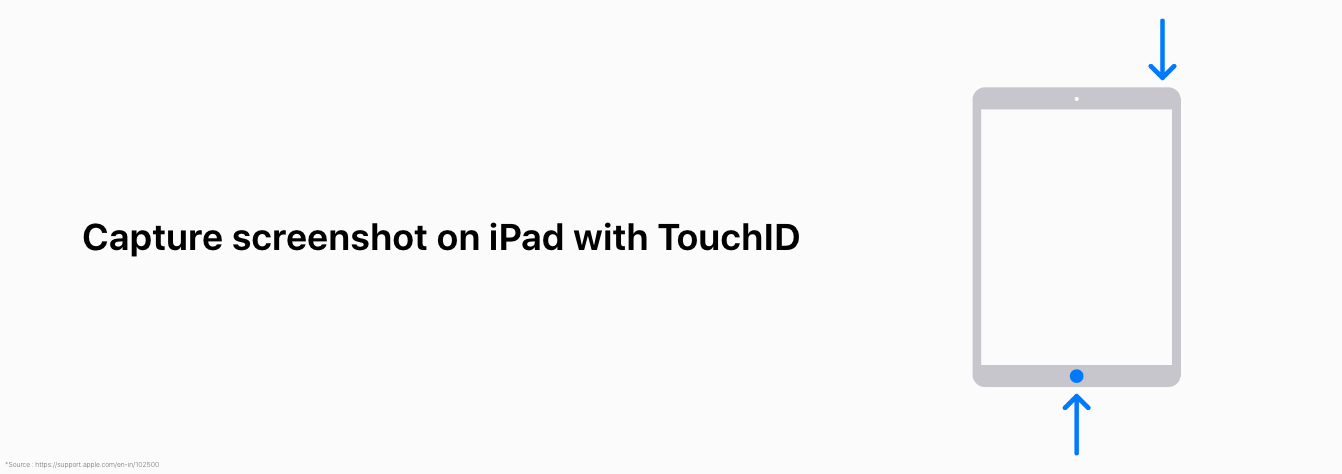
Capturing screenshot on iPad with Touch ID
To capture a screenshot on an iPad with Touch ID, quickly press and release the top button and the Home button at the same time.
Master how to click-and-flash (Screenshot) on MacBook
Tired of scribbling during meetings? Save key slides and visuals effortlessly with a click & capture screenshot on your Mac.
You can capture the whole screen, specific areas, or even individual windows, and make organized notes and clear communication.
You can also use the markup editing tool which you can find by default upon opening the screen capture thumbnail.
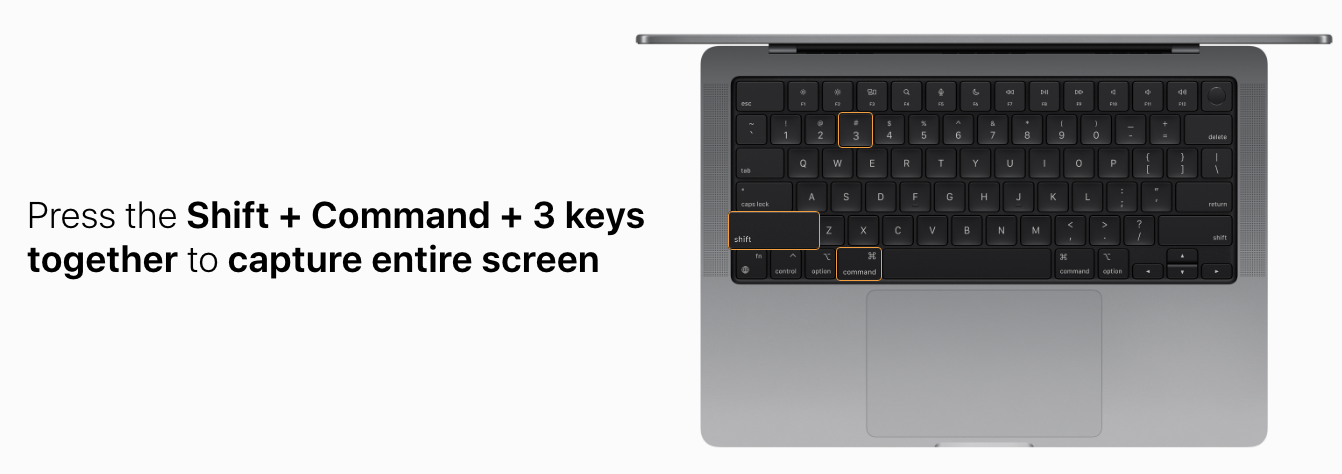
Capturing the entire screen:
To capture the entire screen, hold down the Shift, Command, and numeric three simultaneously. A thumbnail appears at the bottom right corner of the screen, click-on to edit the screenshot or copy & delete or wait for it to save to your desktop.
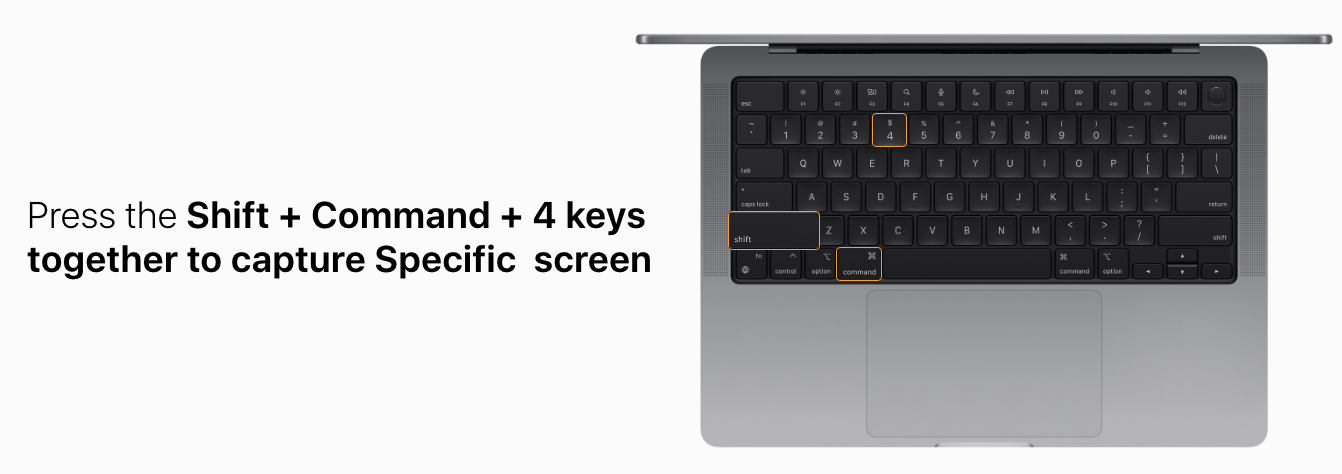
Capturing specific screen:
To capture a particular area of the screen:
- Press the Shift + Command and numeric four together.
- Drag the cursor to select.
- Release your mouse to capture the selection or press escape key in the process to cancel.
- Edit by clicking the thumbnail or let it save to your desktop.
With this screenshot command you can capture specific elements or areas of the screen on your Macbook.
Capturing a Window or Dock or Menu Bar:
To capture a window or menu, open it, then press the Shift + Command + 4 and Spacebar keys. The pointer becomes a camera icon which you can move using cursor, hover the camera icon over to the menu bar or the dock or any window on a desktop to capture that specific section. Now you can edit via thumbnail or save. With this screenshot command you can capture the entire contents of a single window.
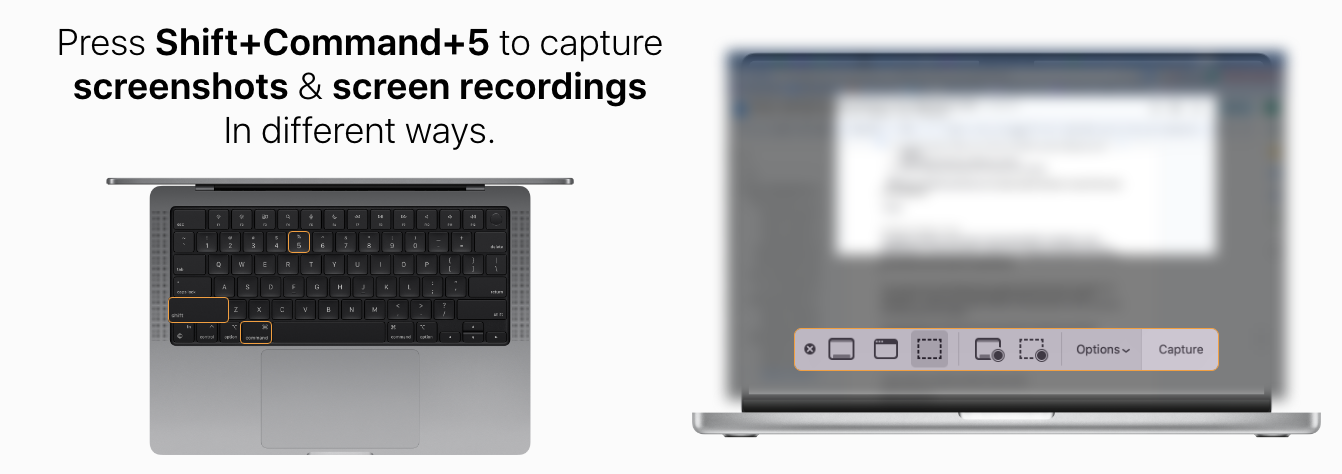
To capture screenshots with more options and customization click on Shift + Command + 5.
A screenshot tool opens with a stash of options for capturing screenshots in different ways (includes capturing specific area, capturing window, capturing entire screen along with the screen recording option)
Capturing those Wrist-Worthy Moments: How to take Screenshots on your Apple Watch
Want to capture your fitness stats, stylish new watch faces, app screens, etc on your Apple Watch?
Enable capturing screenshots in iPhone or Apple Watch for taking screenshots on Apple Watch.
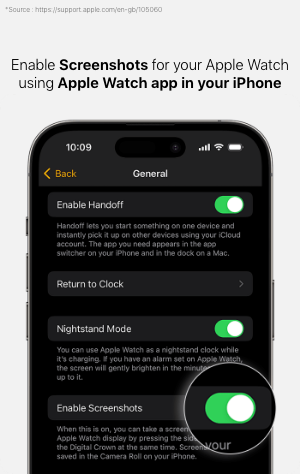
Follow these steps using your iPhone:
- Tap on the Apple’s Watch app on your iPhone.
- Select My Watch tab, then tap on “General”.
- Turn on Enable Screenshots.
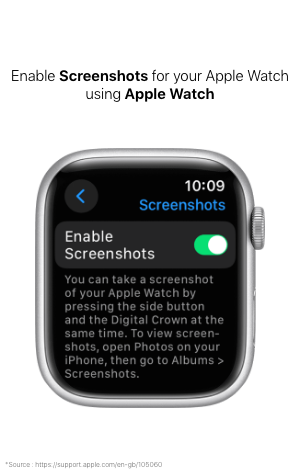
Follow these quick steps to enable screenshots using Apple Watch:
- Go to your Apple Watch's Settings app.
- Select Screenshots from the General
- Make sure that Screenshots are enabled.
Here's how to snap screenshots like a pro, directly from your wrist!
These quick steps allow you to take screenshots on Apple Watch!
And to capture the moment of the screen on your Apple Watch you need to go to the exact screen you want to capture.
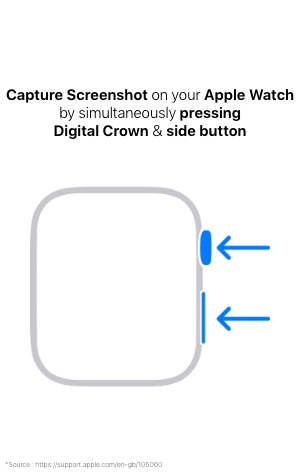
Now, Simultaneously press and release the Digital Crown and side button. You can see a flash on the screen and a gentle vibration when your screenshot is being saved.
Voila!! You have now captured a screenshot of your Apple Watch screen.
With these simple steps to take a screenshot on your iPhone, iPad, Mac & Apple Watch you'll be a screenshot pro in no time. So capture any on-screen moment in flash.

 Sign in
  Account

